Kickstart ISO
The Kickstart ISO is a Nomadesk installation disk that streamlines the installation process using a predefined configuration file.
Downloading the ISO
You can download the necessary ISO file for this installation method from the Nomadesk software FolderLink here: https://nmd.sk/fC14BKw6
Booting the Virtual Machine from the ISO
After creating the virtual machine, boot it from the downloaded ISO file.
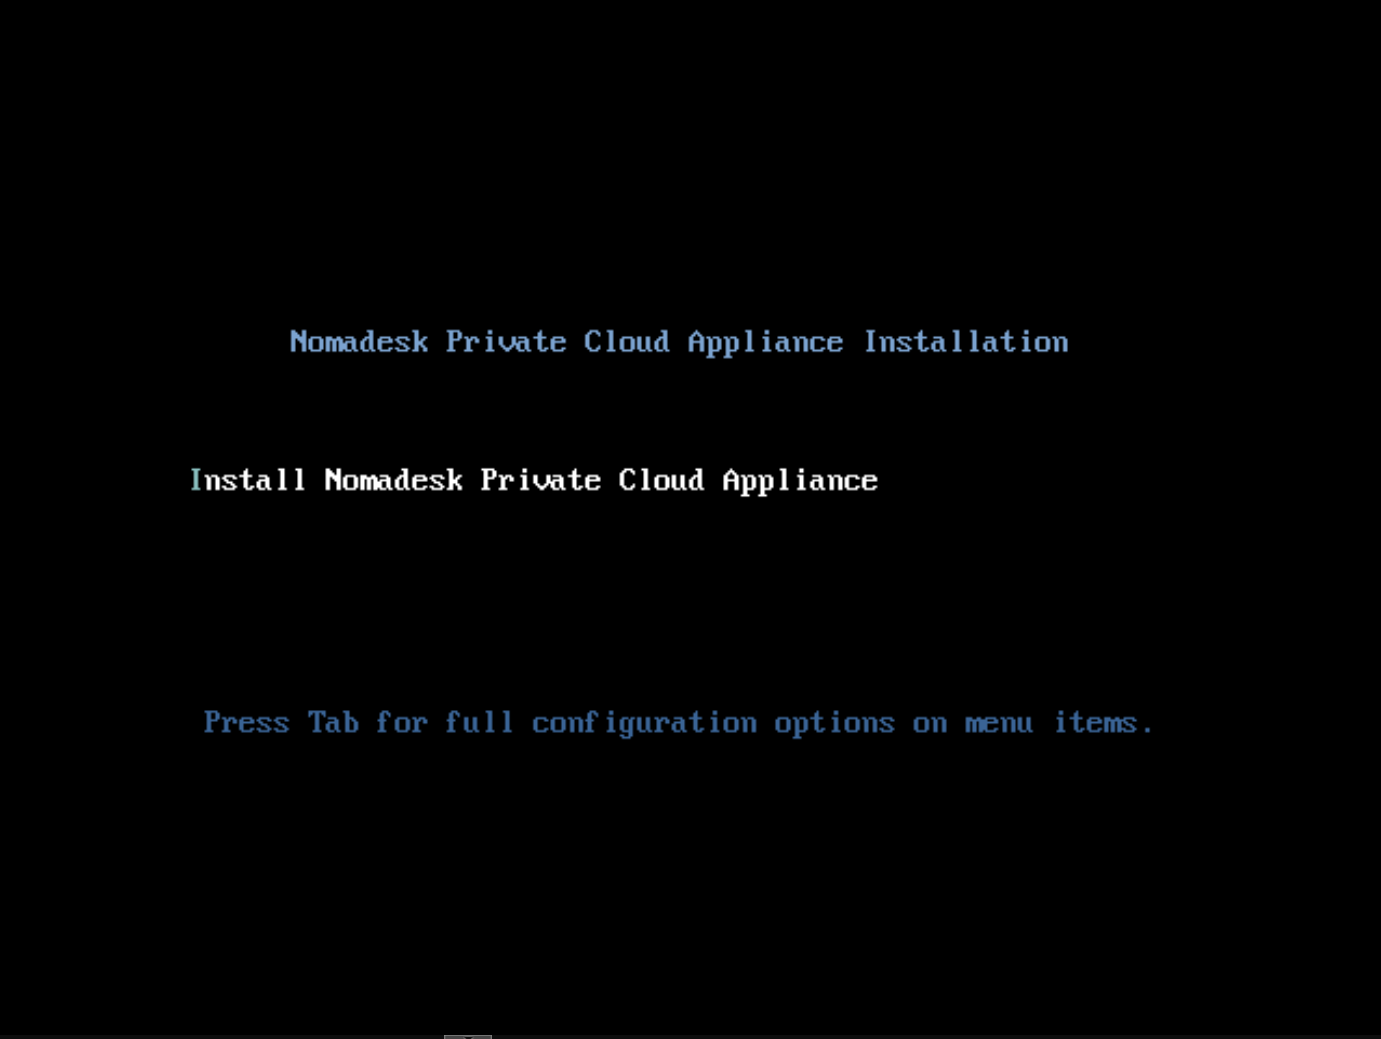
Upon booting from the Kickstart ISO, the following screen should appear:
Configuring a Static IP Address (only needed when not using DHCP)
If your network uses DHCP, you can skip this step.
Otherwise, you'll need to provide the IP configuration for the installation to proceed.
There are two ways to do this:
- Allow the network configuration to time-out and then configure the
IPusing the GUI. - Manually update the start up command to include a static
IP.
Configuring IP Using the GUI
Press Enter on the screen shown above.
This action will attempt to fetch an IP address using DHCP.
If no DHCP server is available, the network setup will time out after 1.5 minutes, allowing you to manually enter a static IP address in the setup graphical interface.
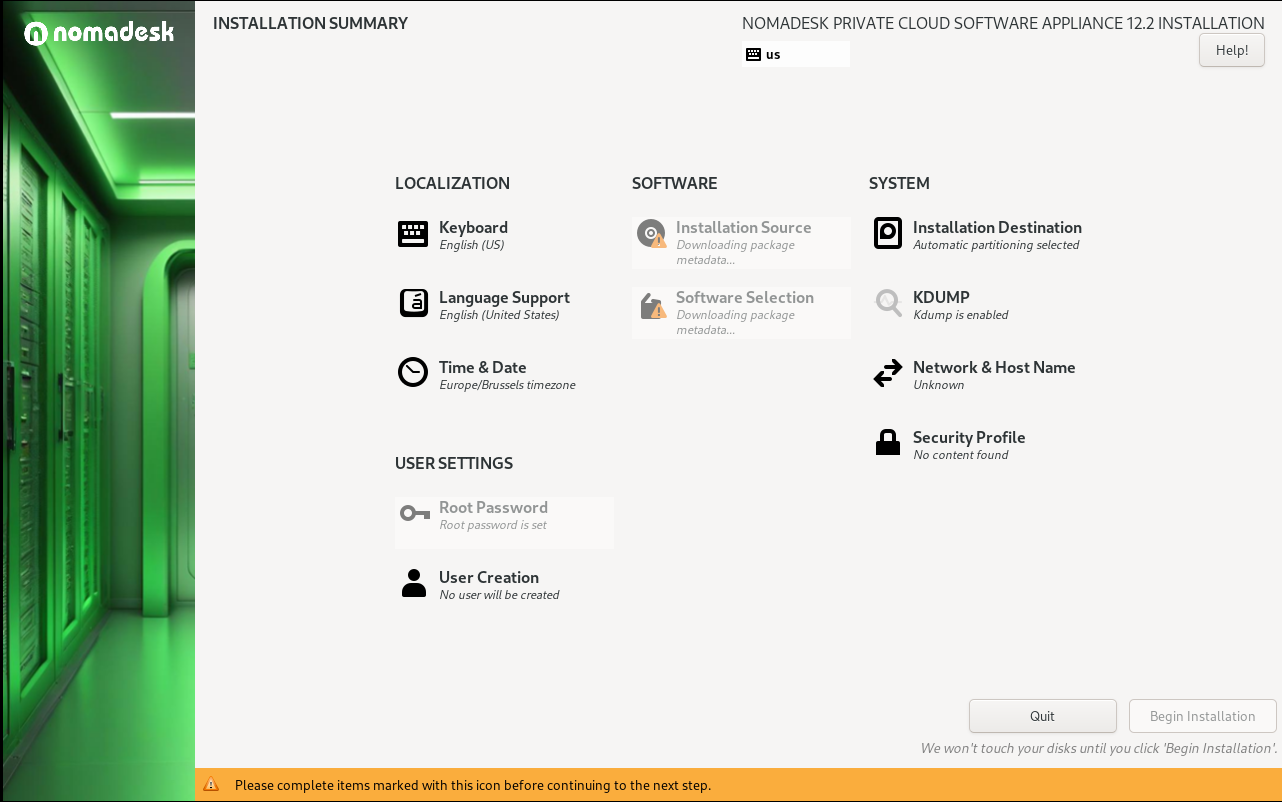
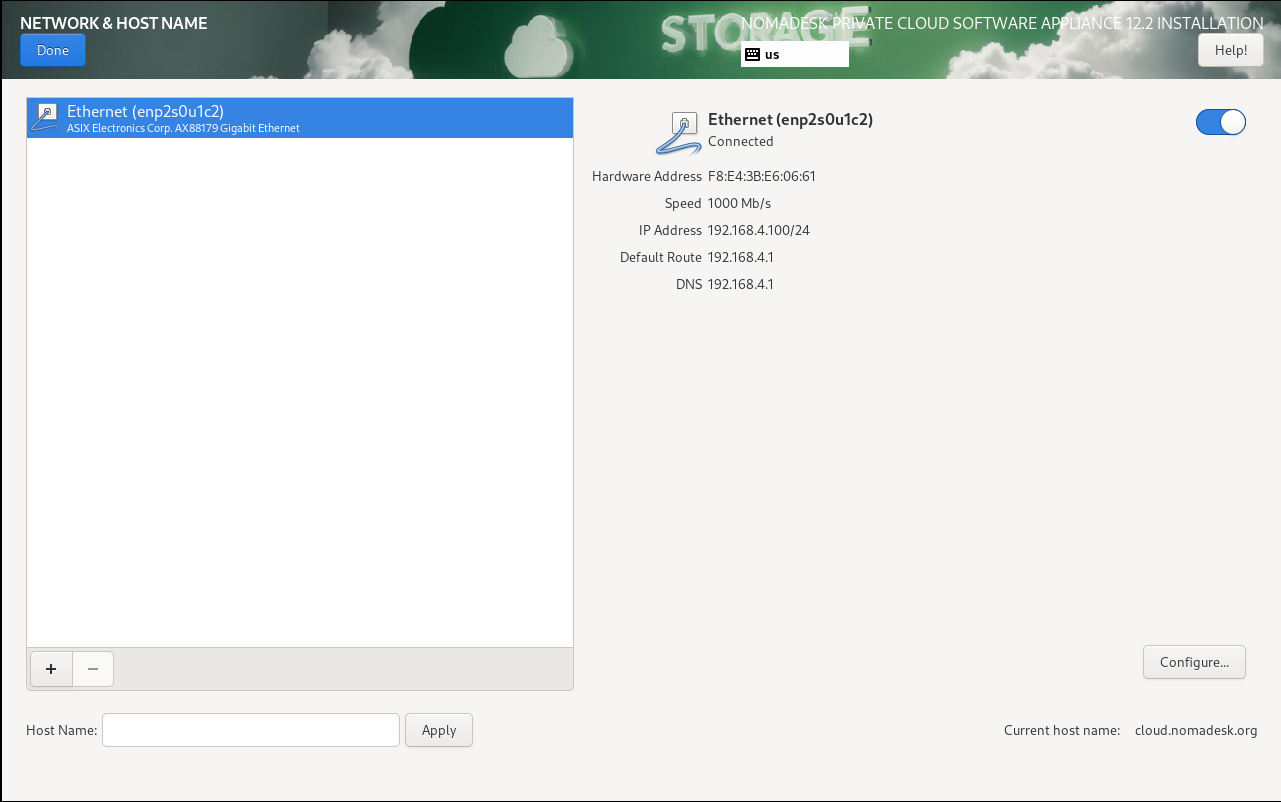
To enter a static IP, click on Network and Host Name in the options. This is where the network setup is done.
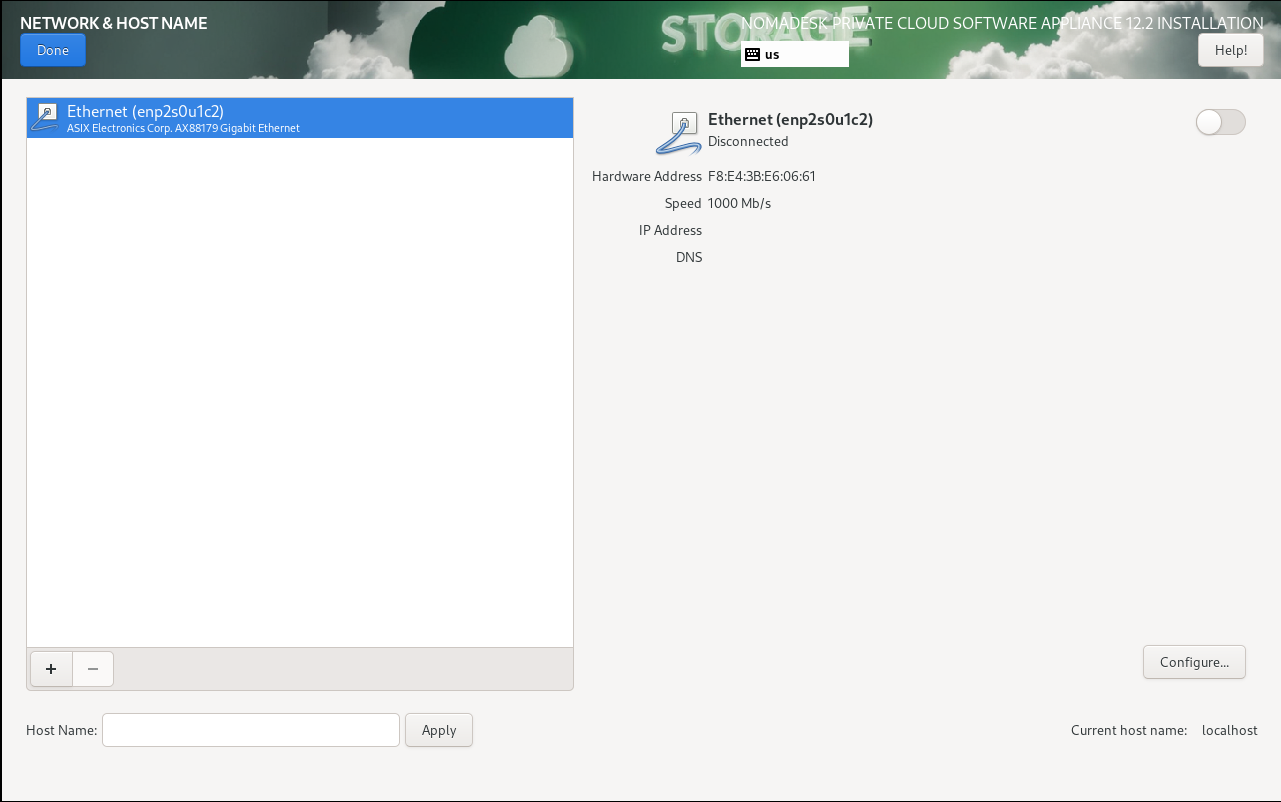
Select the network interface in the list and press Configure in the bottom right:
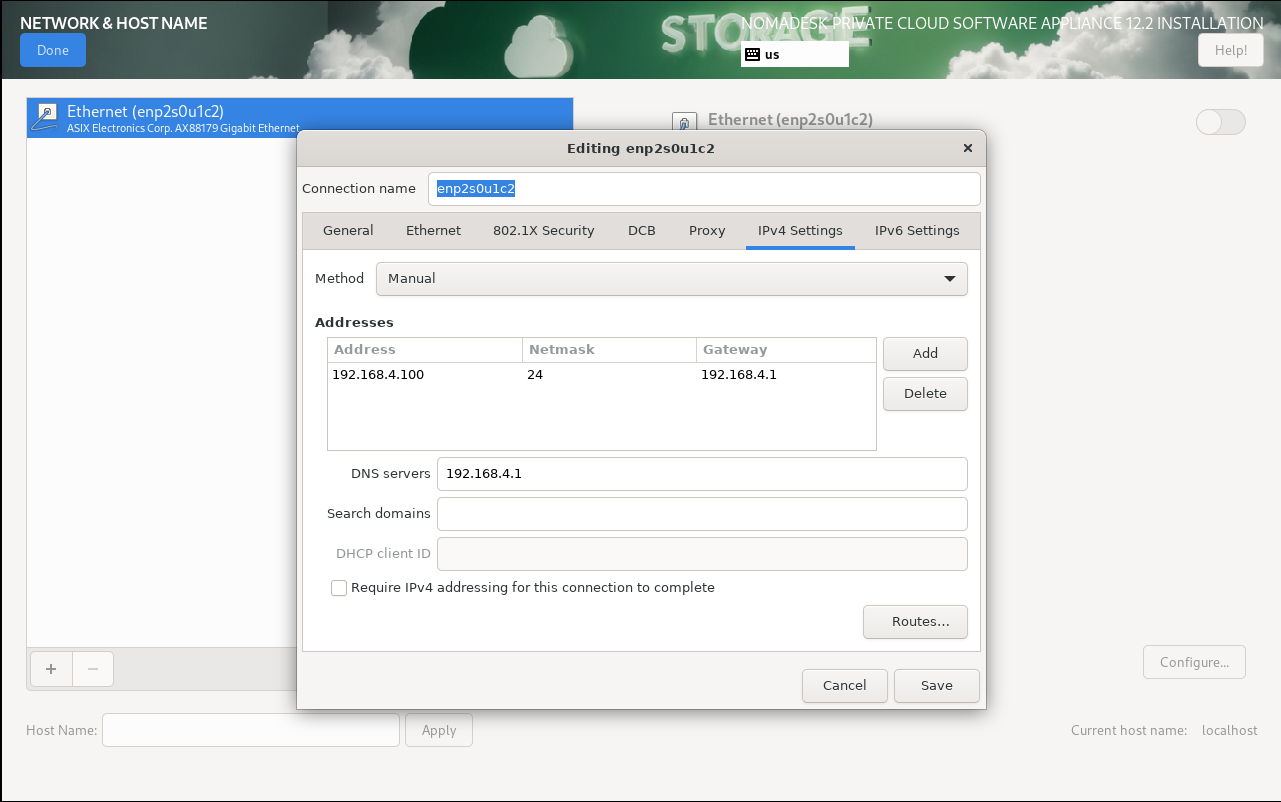
Go to the IPv4 tab, set the Method to manual, and add the IP address(es). DNS servers can be separated by a comma.
Make sure the configured interface is enabled before clicking Done (top right corner).
Once this step is done, click the Done bottom in the top left corner, the repository information will be automatically fetched.
Click Begin Installation once the installation sources have been fetched to start the automatic installation process.
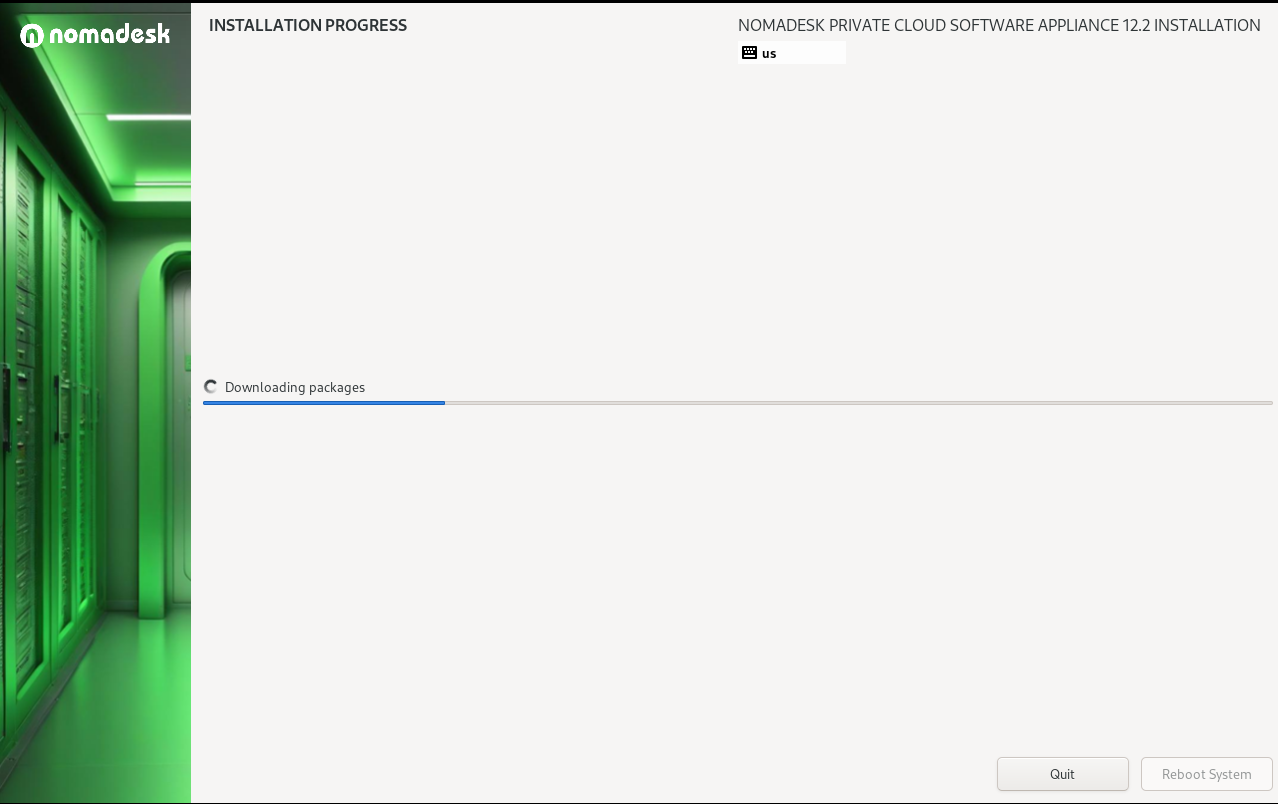
Once the installation is finished, the machine will shut down. Make sure to remove the attached ISO file.
After the installation is complete, proceed to the Nomadesk Private Software Appliance installation step.
Configuring IP by Updating the Start-up Command
Press Tab on the boot screen and modify the start-up command.
Remove the ip=dhcp part and add the following:
ip=<ip>:<boot srv ip>:<gateway>:<netmask>:<hostname>:<interface>:none nameserver=<nameserver>
Where:
ip: The staticIPaddress you want to assignboot server: can be left emptygateway: The default gatewayIPaddressnetmask: Thesubnetmaskhostname: The host name of the system (can be left blank if not needed)interface: The network interface (e.g.,eth0,enp1s0)none: This is to specify that no configuration file is used
Here’s an example for a machine on the 192.168.4.0/24 network where 192.168.4.1 is the gateway and DNS server on the enp1s0 interface:
ip=192.168.4.100::192.168.4.1:255.255.255.0:my.example.cloud:enp1s0:none nameserver=192.168.4.1

Once added, press Enter to start the automatic installation procedure.
When the installation is finished, the machine will shut down. Make sure to remove the attached ISO file.
Proceed to the Nomadesk Private Software Appliance installation step.